Ready to showcase your expertise and start connecting with seekers? Listing your services on Kelunga is quick and easy. Follow these steps to get your services live:
Step 1: Log In to Your Kelunga Account
- Go to kelunga.com and log in using your credentials.
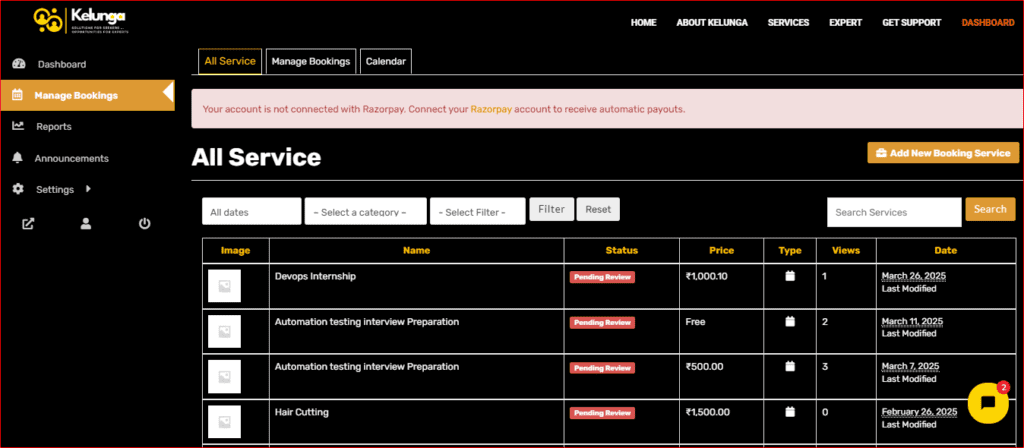
Step 2: Access Your Dashboard
- After logging in, click on your profile and navigate to the “Dashboard” to manage your expert profile.
Step 3: Add a New Service
- In the dashboard, click on “Manage Bookings.
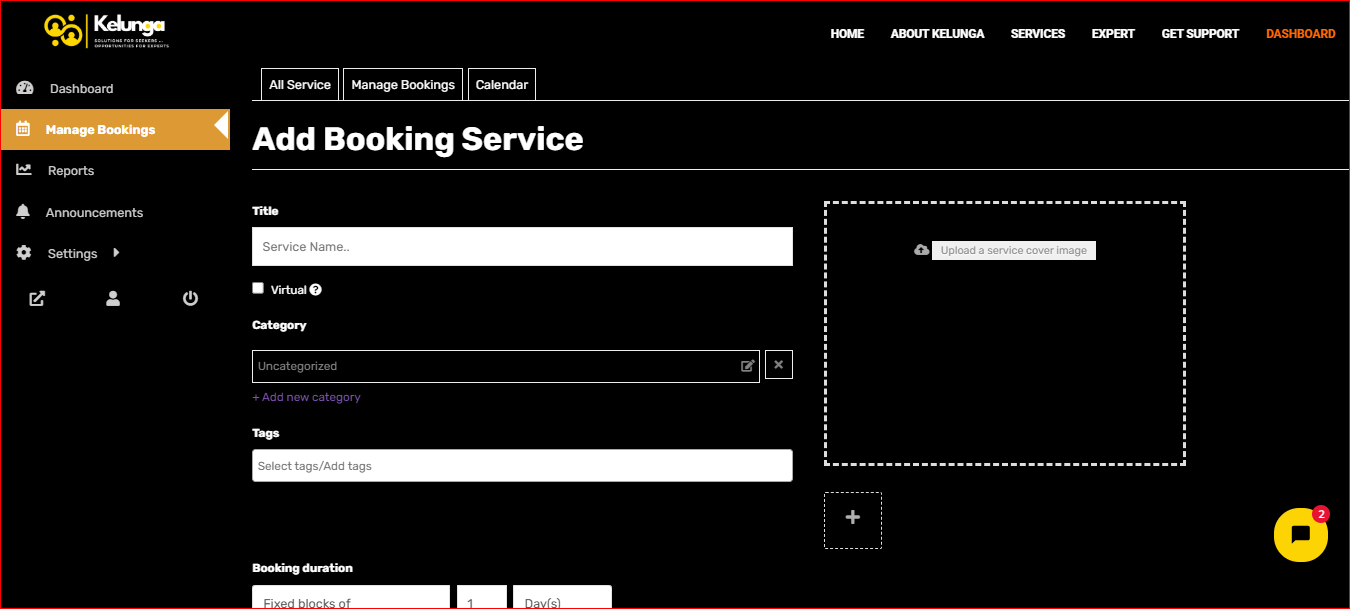
- Select “Add New Booking Service” to begin creating your service listing.
- Service Title: Provide a clear and concise title for your service.

- Virtual Service:
- Check this box as your service is virtual (mandatory).
- Examples: Online consultations, coaching, webinars, virtual events, software demos, or support calls.
- Category:
- Select your service category from the list.
- Select your service category from the list.
-
- If your category is not available, contact the Kelunga team to add it.
 If your category is not available, contact the Kelunga team to add it.
5. Booking Duration: Set the duration of your service in fixed blocks (e.g., 1-hour blocks are recommended).
6. Calendar Visibility:
-
- Choose whether you want your calendar to be visible to seekers.
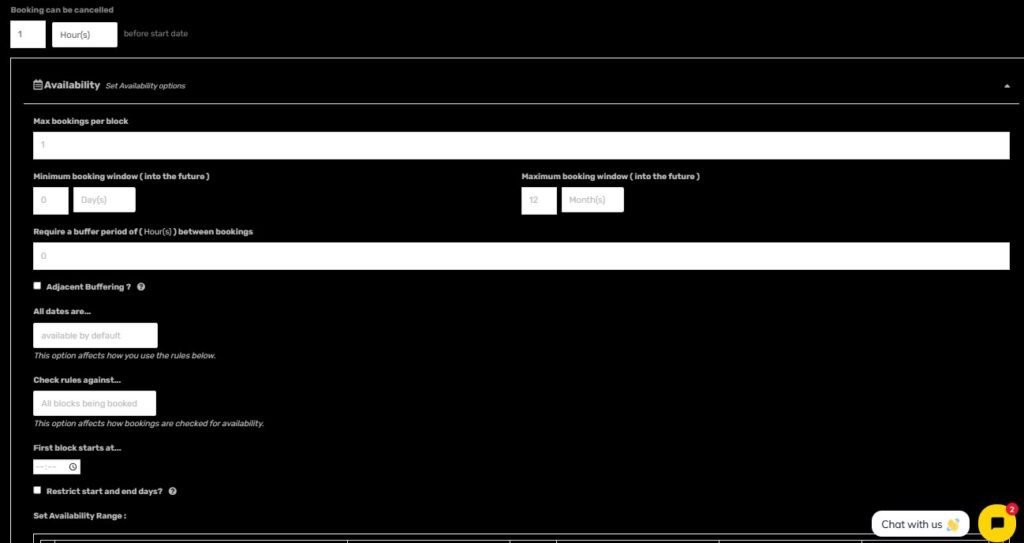
7. Set Availability Range: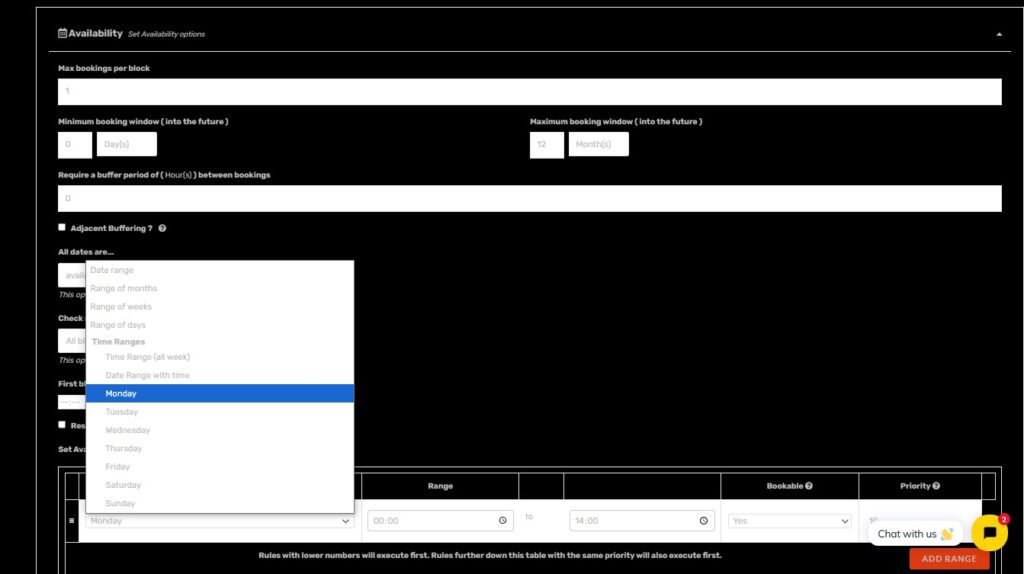
-
-
- Click on “Add Range”.
- Choose the date and timings for your availability.
-
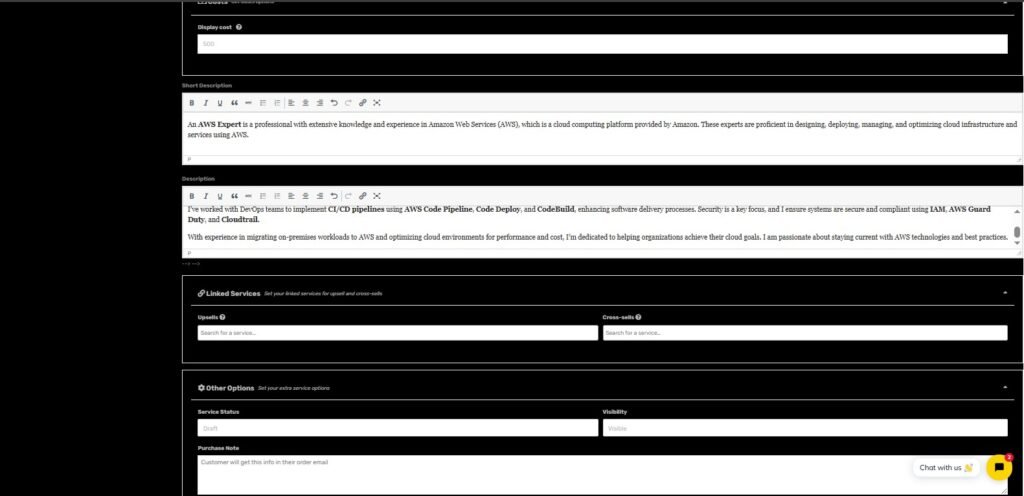
8. Set Pricing and Descriptions
- Pricing: Set your service price.
- Short Description: Provide a brief overview of your service (1-2 sentences).
- Long Description: Add a detailed description of your service, including what seekers can expect, your process, and any other relevant details.
- Save Service:
- In Other Options – keep the status as pending review and Click “Save” to finalize your service listing.
- Kelunga Team will review your listing and approve your listing
9. Allowing Cancellation (Recommended)
- Cancel: Select this check box (recommended) to allow cancellation of seekers booking
- Refund: If a Seeker cancels the booking you will be notified via mail , the amount will not be refunded immediately

10. Requires Confirmation
- Confirmation: If you want the seekers to get a confirmation with you before booking and paying for your service check this box.
- Payment: Payment will not be done by seekers. Only after you confirm your availability , the seekers will get a mail asking for payment. (Not Recommended as potential seekers will be lost during this process )
Explanation of Available Booking Settings for your reference
General Settings
- Booking Duration: Defines how long each booking lasts.
- Fixed blocks (e.g., 1 hour, 1 day).
- Customer-defined blocks (customer chooses the duration).
Availability Settings
- Max Bookings per Block: Sets the number of bookings allowed per time slot.
- Minimum and Maximum Block Bookable: Defines how far in advance a booking can be made.
- Buffer Period Between Bookings: Prevents back-to-back bookings.
- Restrict Start and End Days: Limits bookings to specific days.
- Availability Rules: Set rules for available or unavailable times/dates.
Range Types for Availability
- Date Range
- Set availability for a specific date range.
- Example: Available only from March 1, 2025 – March 31, 2025.
- Range of Days
- Define availability across multiple days of the week.
- Example: Available Monday to Friday, unavailable on weekends.
- Date Range with Time
- Define availability for a date range with specific time slots.
- Example: March 1 – March 15, 9 AM – 5 PM.
- Range of Months
- Restrict bookings to specific months.
- Example: Available only in June, July, and August.
- Range of Weeks
- Define availability based on week numbers in the year.
- Example: Available from Week 10 to Week 20.
- Time Range
- Set availability within specific hours of the day.
- Example: Available only from 9:00 AM to 5:00 PM.
- Range of Time by the Weekday
- Set availability by selecting both days and time slots.
- Example: Available Monday to Friday, from 10:00 AM to 3:00 PM.
- Time Range by the Date
- Similar to “Time Range” but allows date-specific time slots.
- Example: Available on March 5, 2025, from 2:00 PM to 6:00 PM.
Time Ranges
- Time Range (All Week): Apply the same time range to all seven days of the week (e.g., 9 AM – 5 PM daily).
- Date Range with Recurring Time: Set a recurring time slot for a specific date range.
- Example: March 1 – March 15, available 2 PM – 6 PM every day.
- Individual Days (Monday – Sunday): Set availability rules for specific days of the week.
- Example:
- Monday – Available from 10 AM – 2 PM.
- Wednesday – Unavailable.
- Sunday – Available all day.
- Example:
Key Notes:
- Ensure your service title and descriptions are clear, concise, and professional.
- Use tags effectively to improve the discoverability of your service.
- Set your availability and pricing carefully to align with your schedule and expertise.


